Brands
For: merchandising staff organizing storefront brands
What you'll learn: how to create a brand, fill in its identity and visual details, edit or delete a brand, and understand what a brand connects to in OmniCart.
This is a how-to guide for the dashboard, not the API. If you're building an automated integration or bulk-updating brands instead, see the Brands API reference or the Usage Guide.
What a brand is (and isn't)#
A brand in OmniCart is a profile that holds your brand's identity — its name, description, visual styling (logos, colors, fonts), voice, and SEO metadata. A brand can be associated with one or more sales channels, and it can hold customer personas.
A brand is not a product grouping. There is no field on a product for choosing a brand, and there is no product list on a brand. Creating or deleting a brand never changes your products.
Before you start#
You'll need an admin login for your store and the Brands section visible in the left navigation. If you don't see it, ask your administrator to grant brand management access.
Throughout this guide, screenshots use a demo store — the names, brands, and images shown are fake.
1. Open the Brands page#
Log in to the admin dashboard and click Brands in the left navigation.
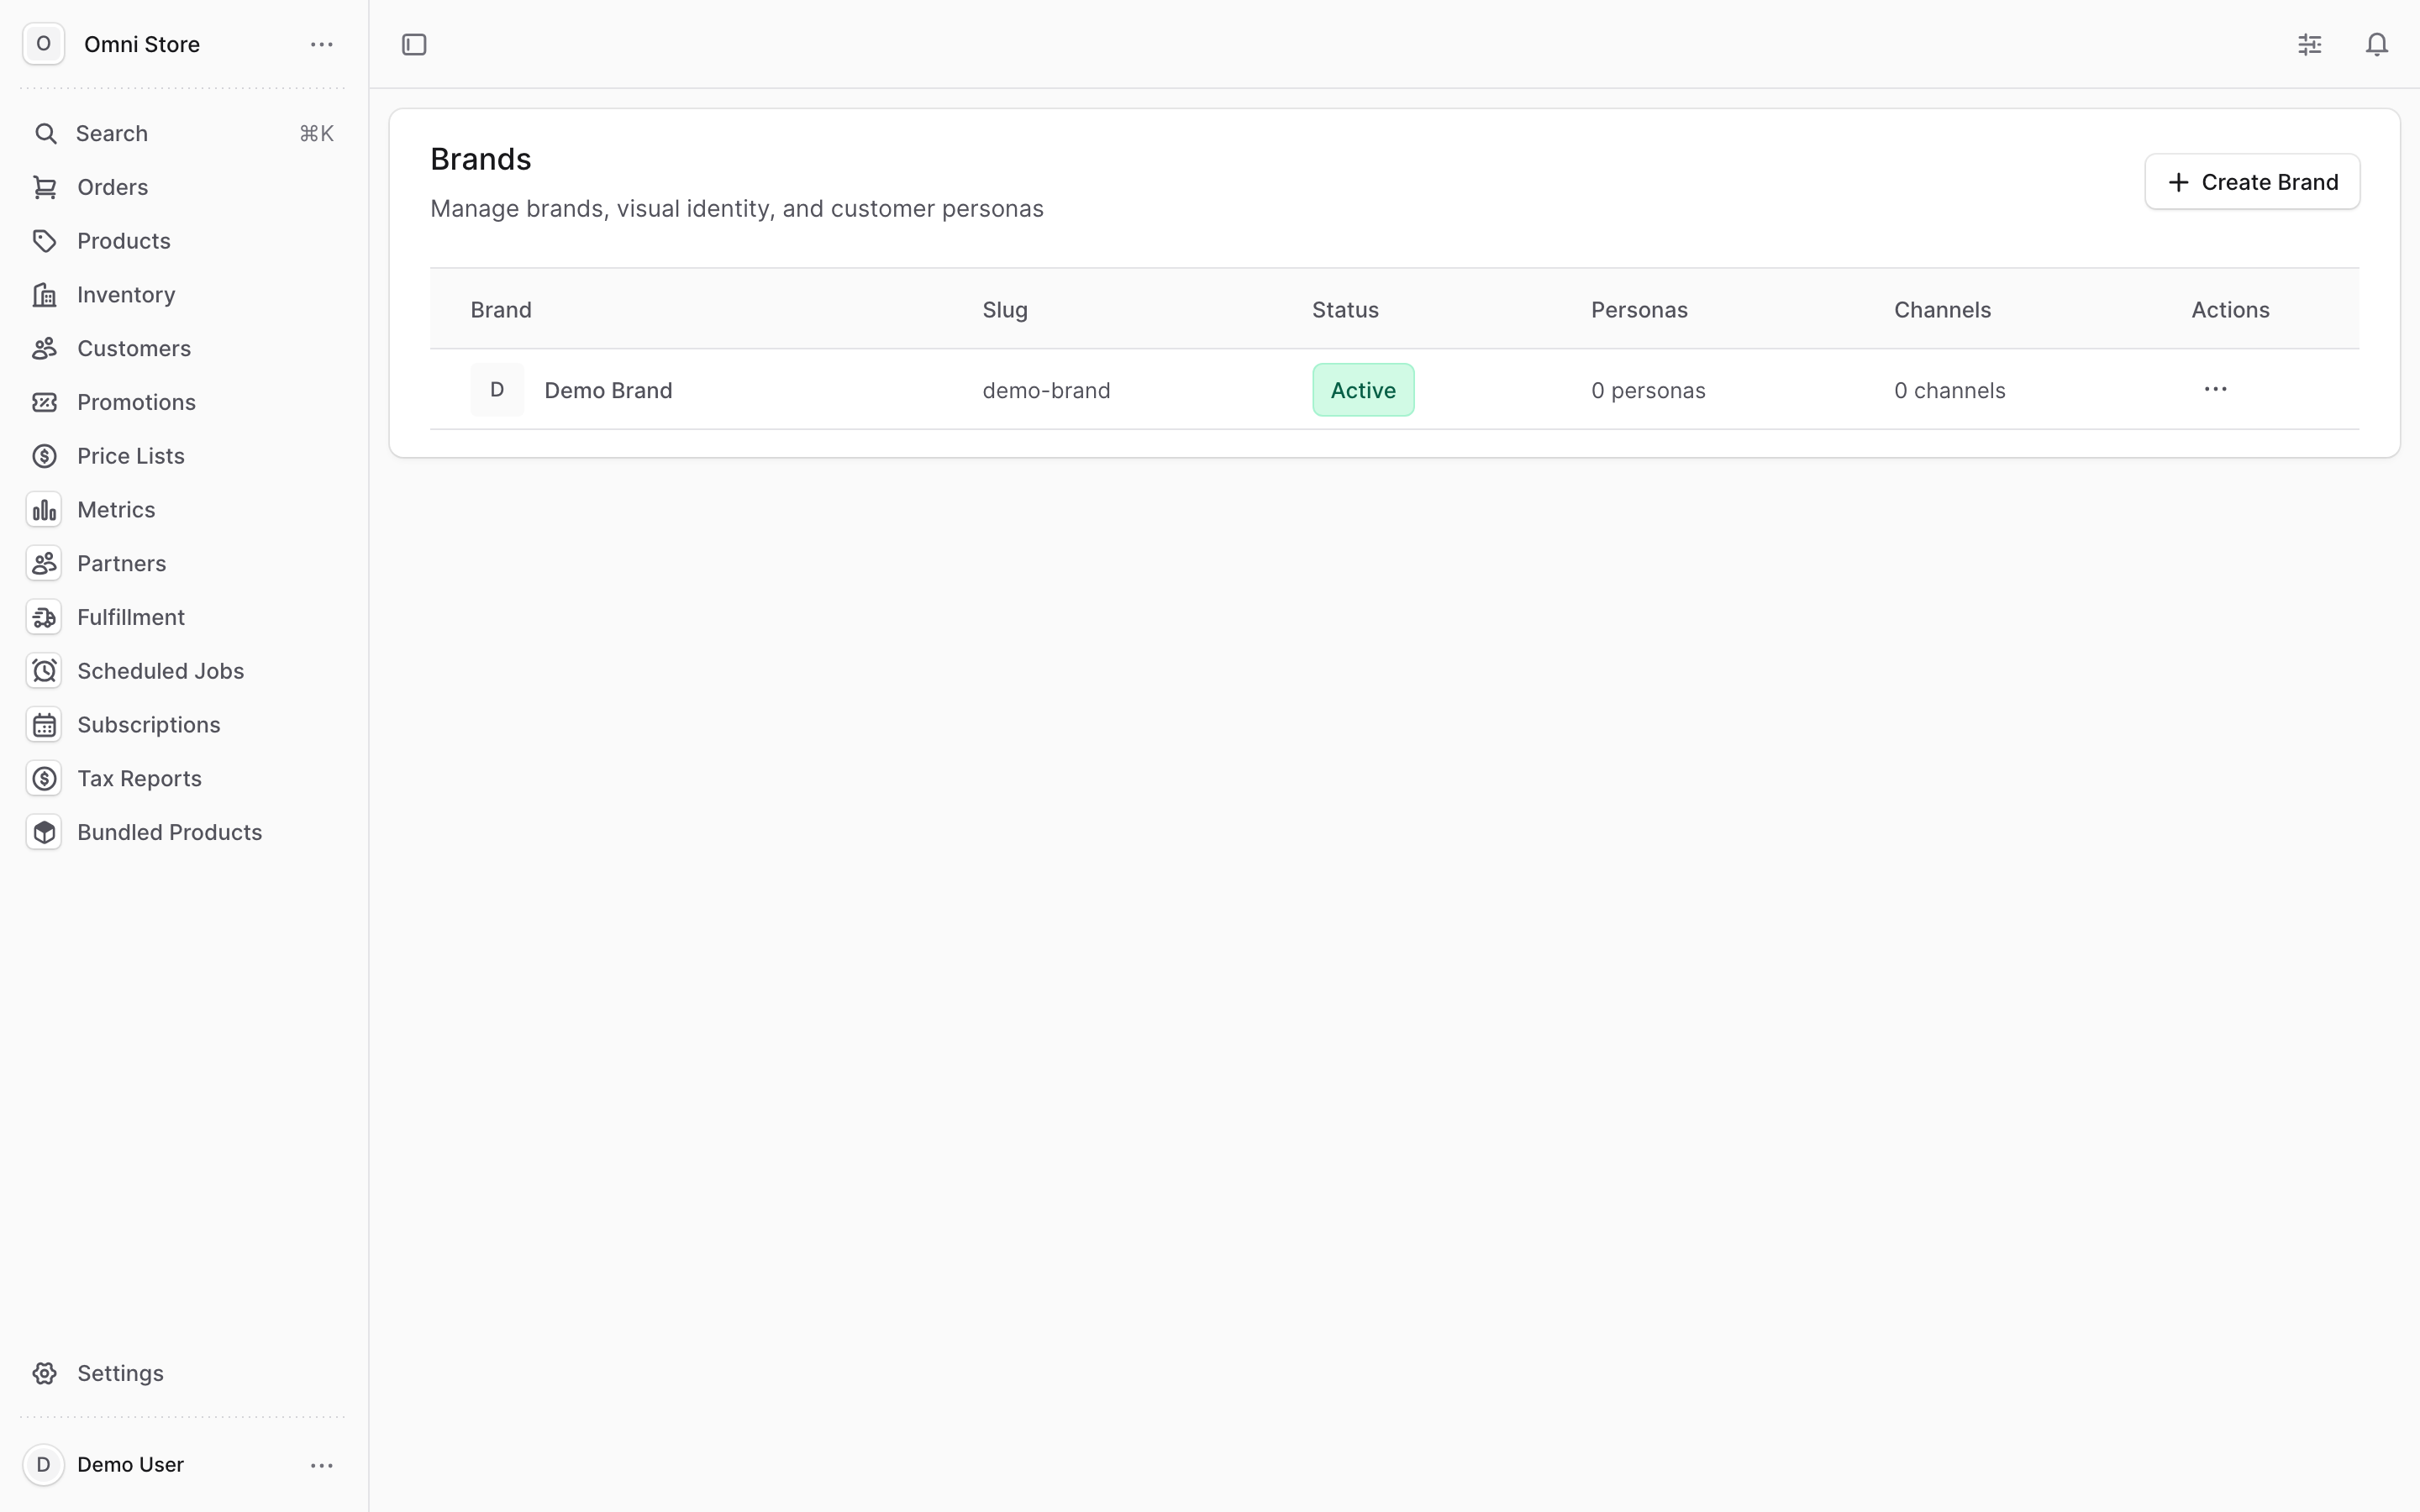
You'll see a list of all brands. Each row shows the brand's logo (or a letter avatar when no logo is set), its name and description, and a few summary columns.
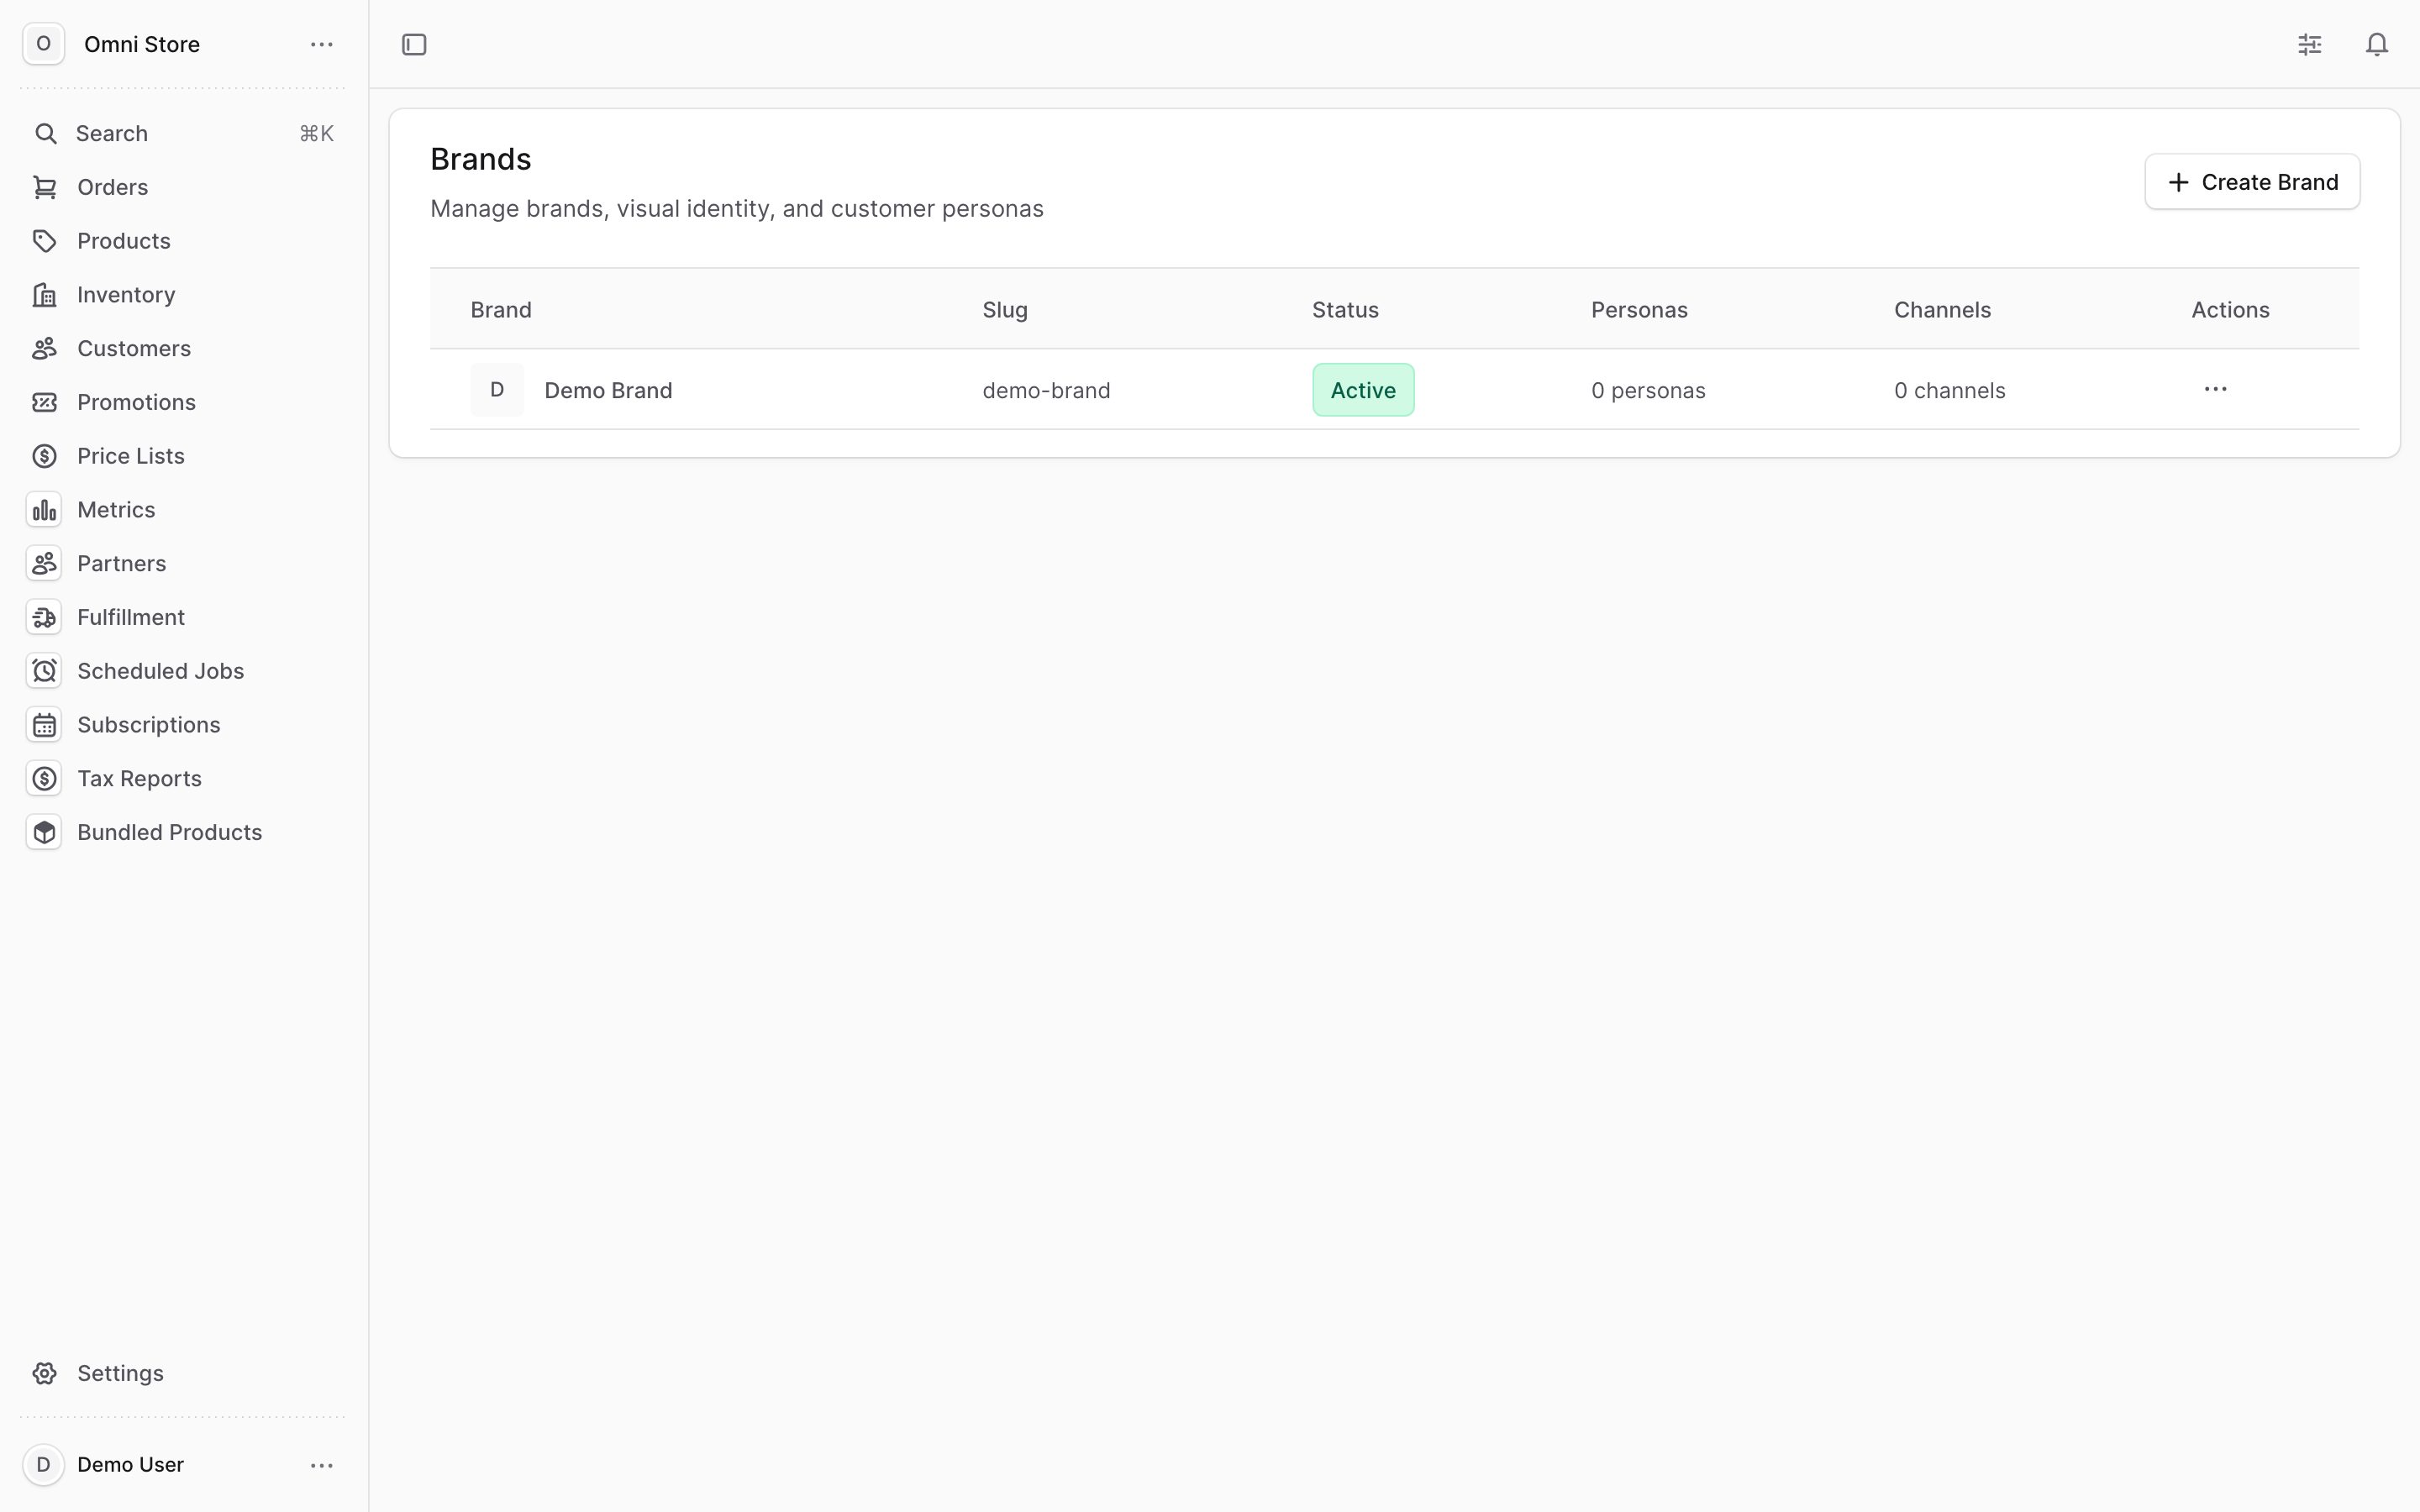
Each row shows:
- Brand — the logo or letter avatar, the brand name, and its description
- Slug — the brand's URL-friendly identifier
- Status — Active, Draft, or Archived (see the table below)
- Personas — how many customer personas the brand holds
- Channels — how many sales channels the brand is associated with
- Actions — a menu for View Details, Edit, and Delete
If you have no brands yet, the page shows an empty state with a Create First Brand button.
| Status | Badge color | Meaning |
|---|---|---|
| Active | Green | The brand is live |
| Draft | Orange | The brand is a work in progress |
| Archived | Grey | The brand is retired from active use |
2. Create a new brand#
Click the Create Brand button in the top-right of the Brands page. A panel opens for entering the brand's details.
The form is organized into sections. Only the brand name is required — every other field is optional, so fill in as much or as little as you need.
Basic information#
- Brand Name — the name of the brand (required)
- Slug — a URL-friendly identifier. Leave it blank to have one generated from the name.
- Status — Draft, Active, or Archived (defaults to Draft)
- Tagline — a short brand tagline
- Description — a longer brand description
- Target Audience — a description of who the brand is for
Visual identity#
- Logo URL — a link to the brand's main logo image
- Square Logo URL — a link to a square version of the logo
- Favicon URL — a link to the brand's favicon
- Primary / Secondary / Accent Color — color pickers for the brand palette
- Primary Font / Secondary Font — the font names to use (for example, Inter or Georgia)
Tip: The three image fields take a web address (URL) to an image you've already hosted — they are not file uploads. Paste the full
https://…link to each image.
Brand voice & guidelines#
- Brand Voice — a short description of the brand's tone
- Brand Guidelines URL — a link to your full brand guide
SEO metadata#
- SEO Title — the brand name as it should appear to search engines
- SEO Description — the brand description for search engines
When you're done, click Create Brand. The new brand is saved and you're taken to its detail page.
3. Edit an existing brand#
To change a brand's details, open the Actions menu (the ⋯ icon) on the brand's row and choose Edit. You can also open the brand by clicking its row and then selecting View Details.
Update any of the fields, then save your changes.
4. Delete a brand#
Open the Actions menu on the brand's row and choose Delete. A confirmation panel appears showing the brand and what will be removed:
- The brand profile and settings
- Any customer personas held by the brand
- The brand's visual assets and guidelines
- The brand's sales channel associations
Caution: Deleting a brand cannot be undone. Removing a brand also removes its personas and its sales channel associations. It does not delete or change any products — products are not connected to brands. Make sure you've backed up anything important before confirming.
Click Delete Brand to confirm, or Cancel to keep the brand.
Quick reference#
| Task | Where to find it |
|---|---|
| View all brands | Brands page (left navigation) |
| Create a brand | Brands page → Create Brand → fill form → Create Brand |
| Edit a brand | Brands page → row Actions menu → Edit → save |
| View brand details | Brands page → row Actions menu → View Details |
| Delete a brand | Brands page → row Actions menu → Delete → confirm |
| Brand status | Active (green), Draft (orange), Archived (grey) |
Need to work with products instead? See Products & Inventory.