Tax & Shipping Setup
For: store admins and managers configuring where you sell, what tax you charge, and how you ship
What you'll learn: how to set up regions, tax rates, stock locations and shipping options, sales channels, and return reasons — all from the Settings area of the admin dashboard.
This is a how-to guide for the dashboard, not the API. If you're building an automated setup instead, see the Usage Guide.
Before you start#
You'll need an admin login for your store and access to the Settings area. This is admin-level configuration, a step above day-to-day order work: the choices here decide what customers see at checkout, what tax they pay, and what shipping they can choose. If you don't see Settings, ask your administrator to grant you the right permissions.
Everything in this guide lives under Settings. Open it from the gear icon (or the Settings link) in the admin dashboard, then pick the sub-page named in each section below.
Throughout this guide, screenshots use a demo store — the names, countries, and amounts shown are fake. All prices are decimals: $9.99 shows as 9.99, never 999 or cents.
1. Where settings live#
All of the setup in this guide is grouped under Settings. Open it and you'll find the sub-pages you need in the list:
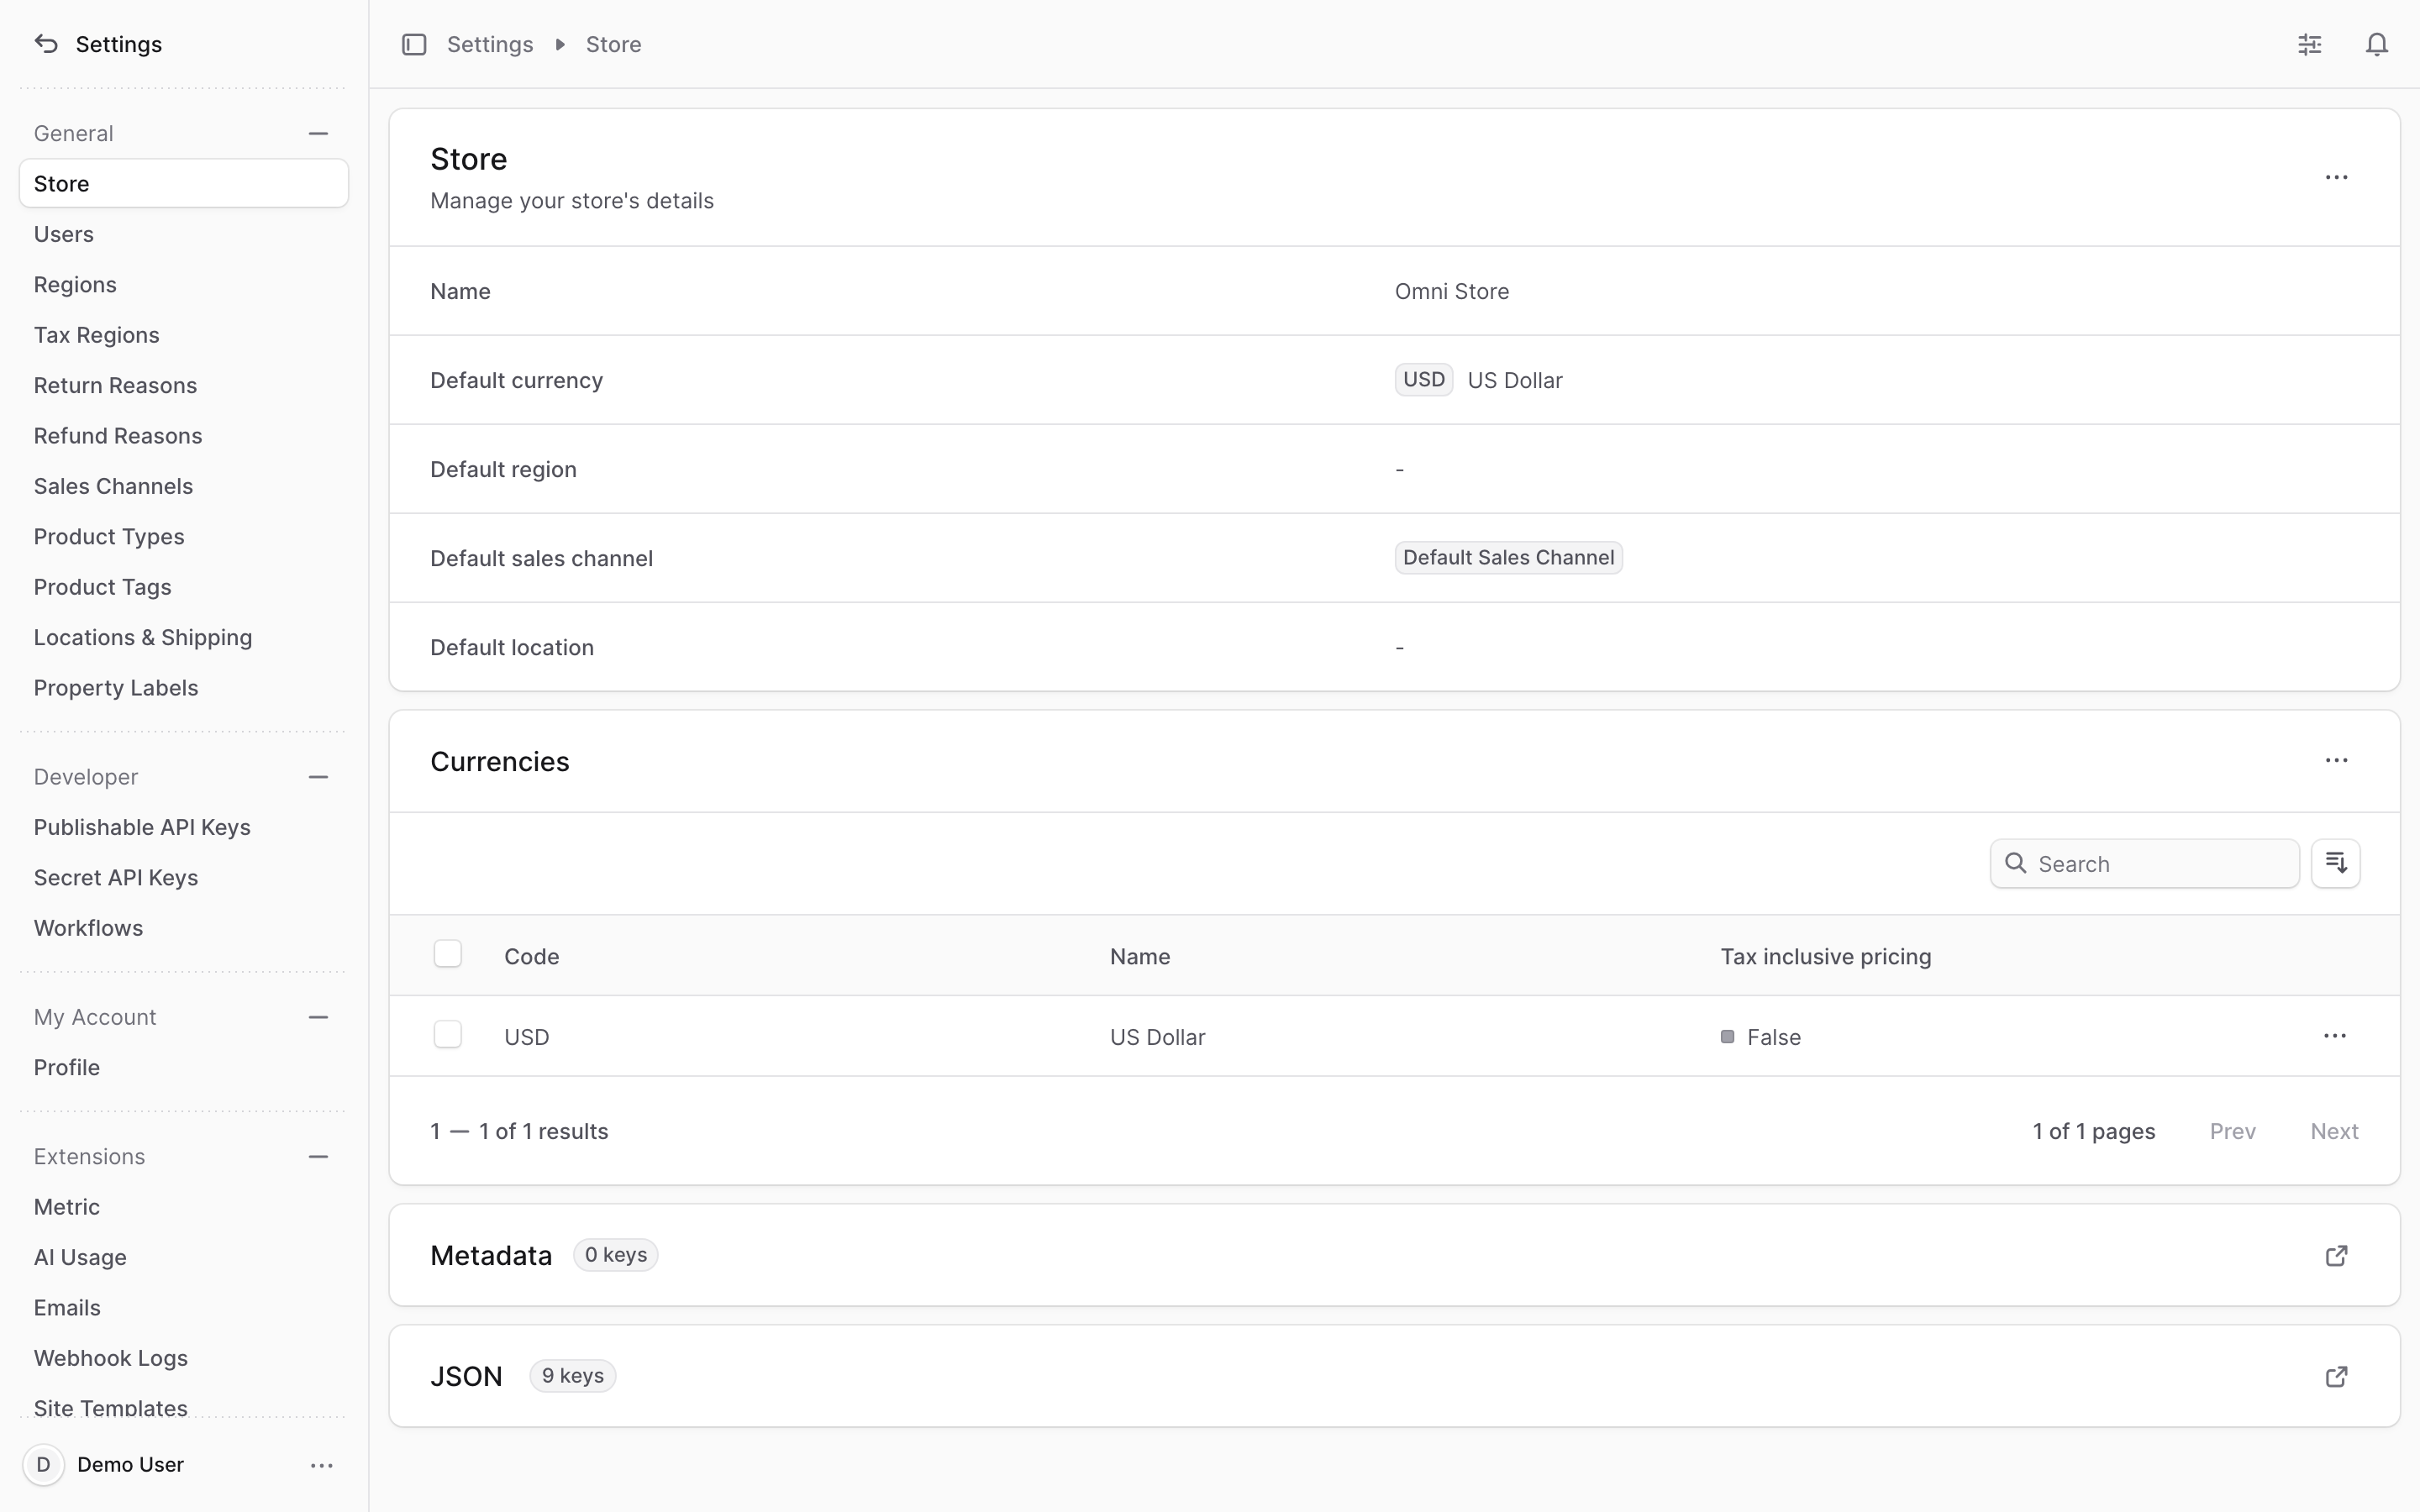
| Sub-page | What you configure there |
|---|---|
| Regions | Groups of countries that share a currency, tax behavior, and payment/fulfillment providers |
| Tax Regions | The tax rates charged per country (and per state/province where it applies) |
| Locations & Shipping | Warehouses, shipping profiles, service zones, and the shipping options customers pick |
| Sales Channels | Which storefront each product is available in |
| Return Reasons | The predefined reasons operators choose when taking items back |
Work through them roughly in this order — regions first (they set currency), then tax, then shipping, then channels, then return reasons.
2. Regions#
A region is a group of one or more countries you serve under the same rules: a single currency, its own tax behavior, and its own payment and fulfillment providers. For example, a "Europe" region might cover several countries all priced in euros.
Create a region#
- Go to Settings > Regions and click Create.
- Fill in the form:
| Field | What it means |
|---|---|
| Name | A label for the region, e.g. "Europe" or "United States" |
| Currency | The single currency this region is priced in |
| Automatic taxes | Whether tax is calculated automatically for orders in this region |
| Tax inclusive pricing | Whether your listed prices already include tax |
| Countries | The countries this region covers (see below) |
| Payment providers | The payment methods customers in this region can use |
- Click Save.
Add countries to a region#
While creating a region, click Add countries, check the countries you want, and Save. To change countries later, open the region's details page, click the three-dots menu in the Countries section, choose Add countries, check the ones you need, and click Add.
Tip: Keep one region per currency. If you sell in dollars and euros, that's two regions — a region can only have one currency.
Caution: A region's currency and tax settings feed straight into what customers are charged at checkout. Changing them affects live orders, so review carefully before saving.
3. Tax Regions#
A tax region is a country (and, where it applies, a state or province) where you charge a specific tax rate. Tax regions are managed separately from the regions above so you can set the exact rate each place requires.
Set up a tax region and its default rate#
- Go to Settings > Tax Regions and click Create.
- Select the Country.
- Optionally set the default tax rate by entering a Name, a Tax rate (a percentage), and a Tax code.
- Click Save.
The default tax rate is the baseline applied to everything sold in that tax region; you can edit it later from the tax region's details page.
Tax overrides#
An override is an exception to the default rate for specific items — useful when a particular product, product type, or shipping option is taxed differently from everything else.
- Open the tax region's details page.
- In the Overrides section, click Create.
- Enter an override name, the tax rate, and a tax code.
- Set the Targets — the product, product type, or shipping option the override applies to.
- Click Save.
For countries with state- or province-level tax (such as US states or Canadian provinces), you can create sublevel tax regions under the country, each with its own default rate and overrides.
Caution: Tax rates decide what customers pay at checkout. Editing a rate or adding an override changes live tax on new orders immediately — double-check the percentage before you save.
4. Locations & Shipping#
This page holds four related things: stock locations (your warehouses), shipping profiles (product groupings for fulfillment), service zones (geographic areas), and shipping options (the priced choices customers see at checkout).
Stock locations#
A stock location is a place you fulfill orders from. It is tied to sales channels, so orders from those channels ship from this location.
- Go to Settings > Locations & Shipping and click Create.
- Enter a name (e.g. "Main Warehouse") and the address (at minimum an address line and country).
- Click Save. Edit the name or address later from the location's three-dots menu.
Shipping profiles#
A shipping profile groups products that need the same fulfillment handling — for example, fragile items shipped differently from ordinary ones. Shipping options are attached to a profile, so a profile is how you route particular products to particular options.
Service zones#
A service zone is a geographic area where you offer a set of shipping options — for instance, a "United States" zone.
- On the location's details page, click the three-dots menu in the Shipping (or Pickup) section header.
- Choose Create service zone and enter a name.
- Click Manage areas to select the countries the zone covers, then Save.
Shipping options and their prices#
A shipping option is a delivery choice the customer picks at checkout — with its price.
- Find the service zone on the location's details page and click Create option.
- Fill in the fields:
| Field | What it means |
|---|---|
| Name | The label the customer sees at checkout, e.g. "Standard Shipping" |
| Price type | Fixed (a set amount) or Calculated (worked out dynamically) |
| Shipping profile | Restricts the option to products in that profile |
| Fulfillment provider | Who handles the delivery |
| Enable in store | Whether customers can see and choose this option |
- For a Fixed price, set the amount per currency/region using the bulk price editor.
- Click Save.
Enter shipping prices in decimals: type 9.99 for $9.99, or 15 for $15.00. Never enter cents — 999 would mean a $999 shipping charge, not $9.99.
Tip: Give shipping options clear, plain names ("Standard Shipping", "Express Shipping"). Customers read these at checkout, so the wording matters.
Caution: Shipping prices and the Enable in store toggle change your live checkout right away. Raising a price, lowering it, or turning an option on or off changes what every shopper is charged and offered — verify the amount and the toggle before saving. For a store-wide free-shipping threshold instead, see Free Shipping (coming soon).
5. Sales Channels#
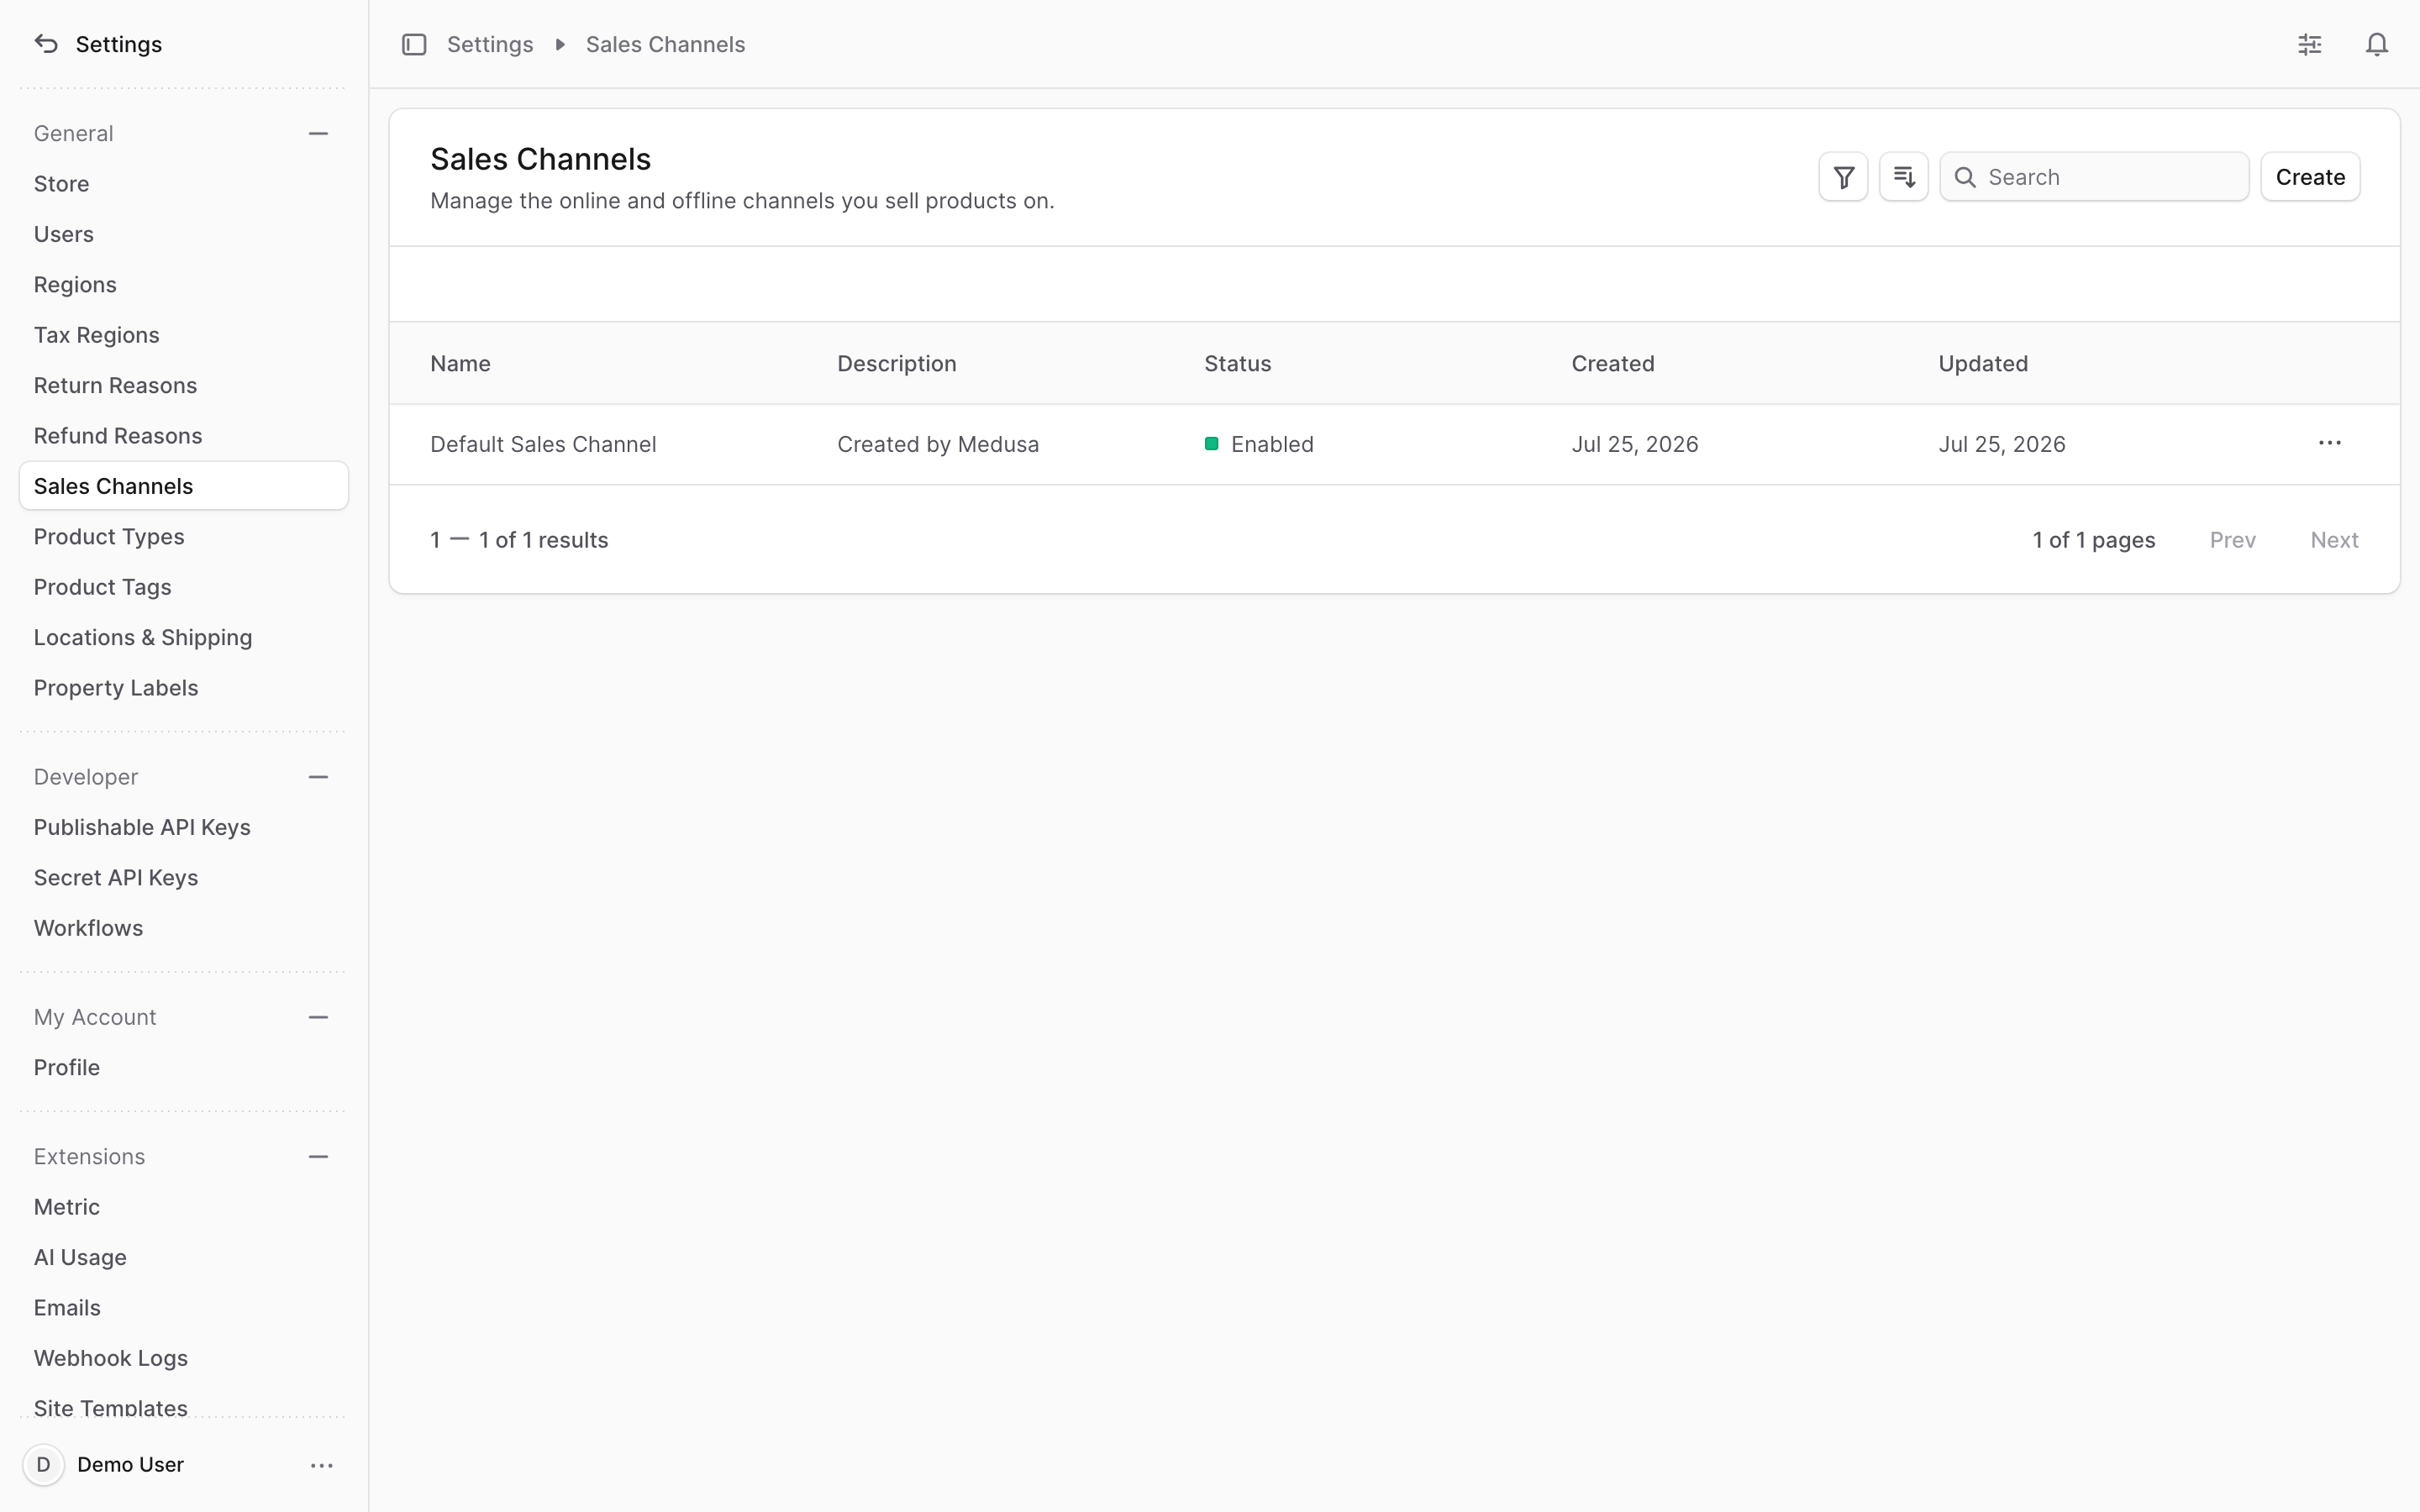
A sales channel is a path you sell through — typically a storefront, but it could be a mobile app or another surface. You control which products appear in each channel, so different channels can carry different catalogs.
The important gotcha#
A product only appears in a storefront if it is in that storefront's sales channel. Availability is explicit, not automatic: if a product isn't assigned to the channel, it will not show up there — even if the product is published and in stock. This is the single most common reason a product is "missing" from a storefront in OmniCart.
Create a sales channel#
- Go to Settings > Sales Channels and click Create.
- Enter a Name (e.g. "Web Storefront") and an optional Description.
- Click Save.
Add products to a sales channel#
- Open the sales channel's details page.
- In the Products section, click Add.
- Check the products you want available in this channel, then click Save.
To remove a product, select it and use the Remove button, then confirm.
Caution: Adding or removing a product from a sales channel changes what shoppers can see and buy on that storefront immediately. Removing a live product hides it from customers at once.
Tip: If a product is live but not showing on the storefront, check its sales-channel assignment first — that's usually the cause. See Products & Inventory for where to set a product's channels.
6. Return Reasons#
A return reason is a predefined category explaining why an item is coming back — for example "damaged", "wrong size", or "changed mind". Operators pick one of these from a list when processing a return, so setting good reasons up front keeps your returns data consistent.
Create a return reason#
- Go to Settings > Return Reasons and click Create.
- Fill in the three fields:
| Field | What it means |
|---|---|
| Value | A short internal identifier in lowercase with underscores, e.g. wrong_size |
| Label | The readable text shown when choosing the reason, e.g. "Wrong size" |
| Description | Optional extra context about when to use this reason |
- Click Save.
To change a reason later, open Settings > Return Reasons, use the ellipsis menu, choose Edit, adjust the fields, and save. Deleting a reason from the same menu is irreversible.
These reasons appear as choices when operators create a return, exchange, or claim — see Returns, Exchanges & Claims for how they're used in practice.
Tip: Keep the list short and clear. A handful of well-named reasons is easier for operators to choose from — and far easier to report on — than a long, overlapping list.
Quick reference#
- Everything lives under Settings — Regions, Tax Regions, Locations & Shipping, Sales Channels, Return Reasons.
- Region = countries sharing one currency + tax behavior + payment/fulfillment providers. One currency per region.
- Tax region = a country (or state/province) with a default rate; use overrides for products/shipping taxed differently.
- Locations & Shipping = warehouses (stock locations), product groupings (shipping profiles), geographic service zones, and the shipping options customers pick.
- Shipping prices are decimals — enter
9.99for $9.99, never999or cents. - Sales channel gotcha — a product must be in a storefront's sales channel to appear there; assignment is explicit, not automatic. See Products & Inventory.
- Return reasons = predefined pick-list operators use when taking items back. See Returns, Exchanges & Claims.
- Anything touching tax rates, shipping prices, or sales-channel assignment changes live checkout immediately — verify before you save.