Order Basics
For: operations managers and support staff managing orders day-to-day in the admin dashboard What you'll learn: how to find an order, read its detail page, understand payment and fulfillment status, add internal notes, and follow the activity timeline.
This is a how-to guide for the dashboard, not the API. If you're building an automated integration instead, see the Usage Guide.
Before you start#
You'll need an admin login for your store and the Orders section visible in the left navigation. If you don't see it, ask your administrator to grant order-management access.
Throughout this guide, screenshots use a demo store — the names, orders, and addresses shown are fake.
1. Finding an order#
Log in to the admin dashboard, then click Orders in the left navigation. You'll see a list of all orders with columns for Order number, Date, Customer, Sales Channel, Payment status, Fulfillment status, and Order Total.
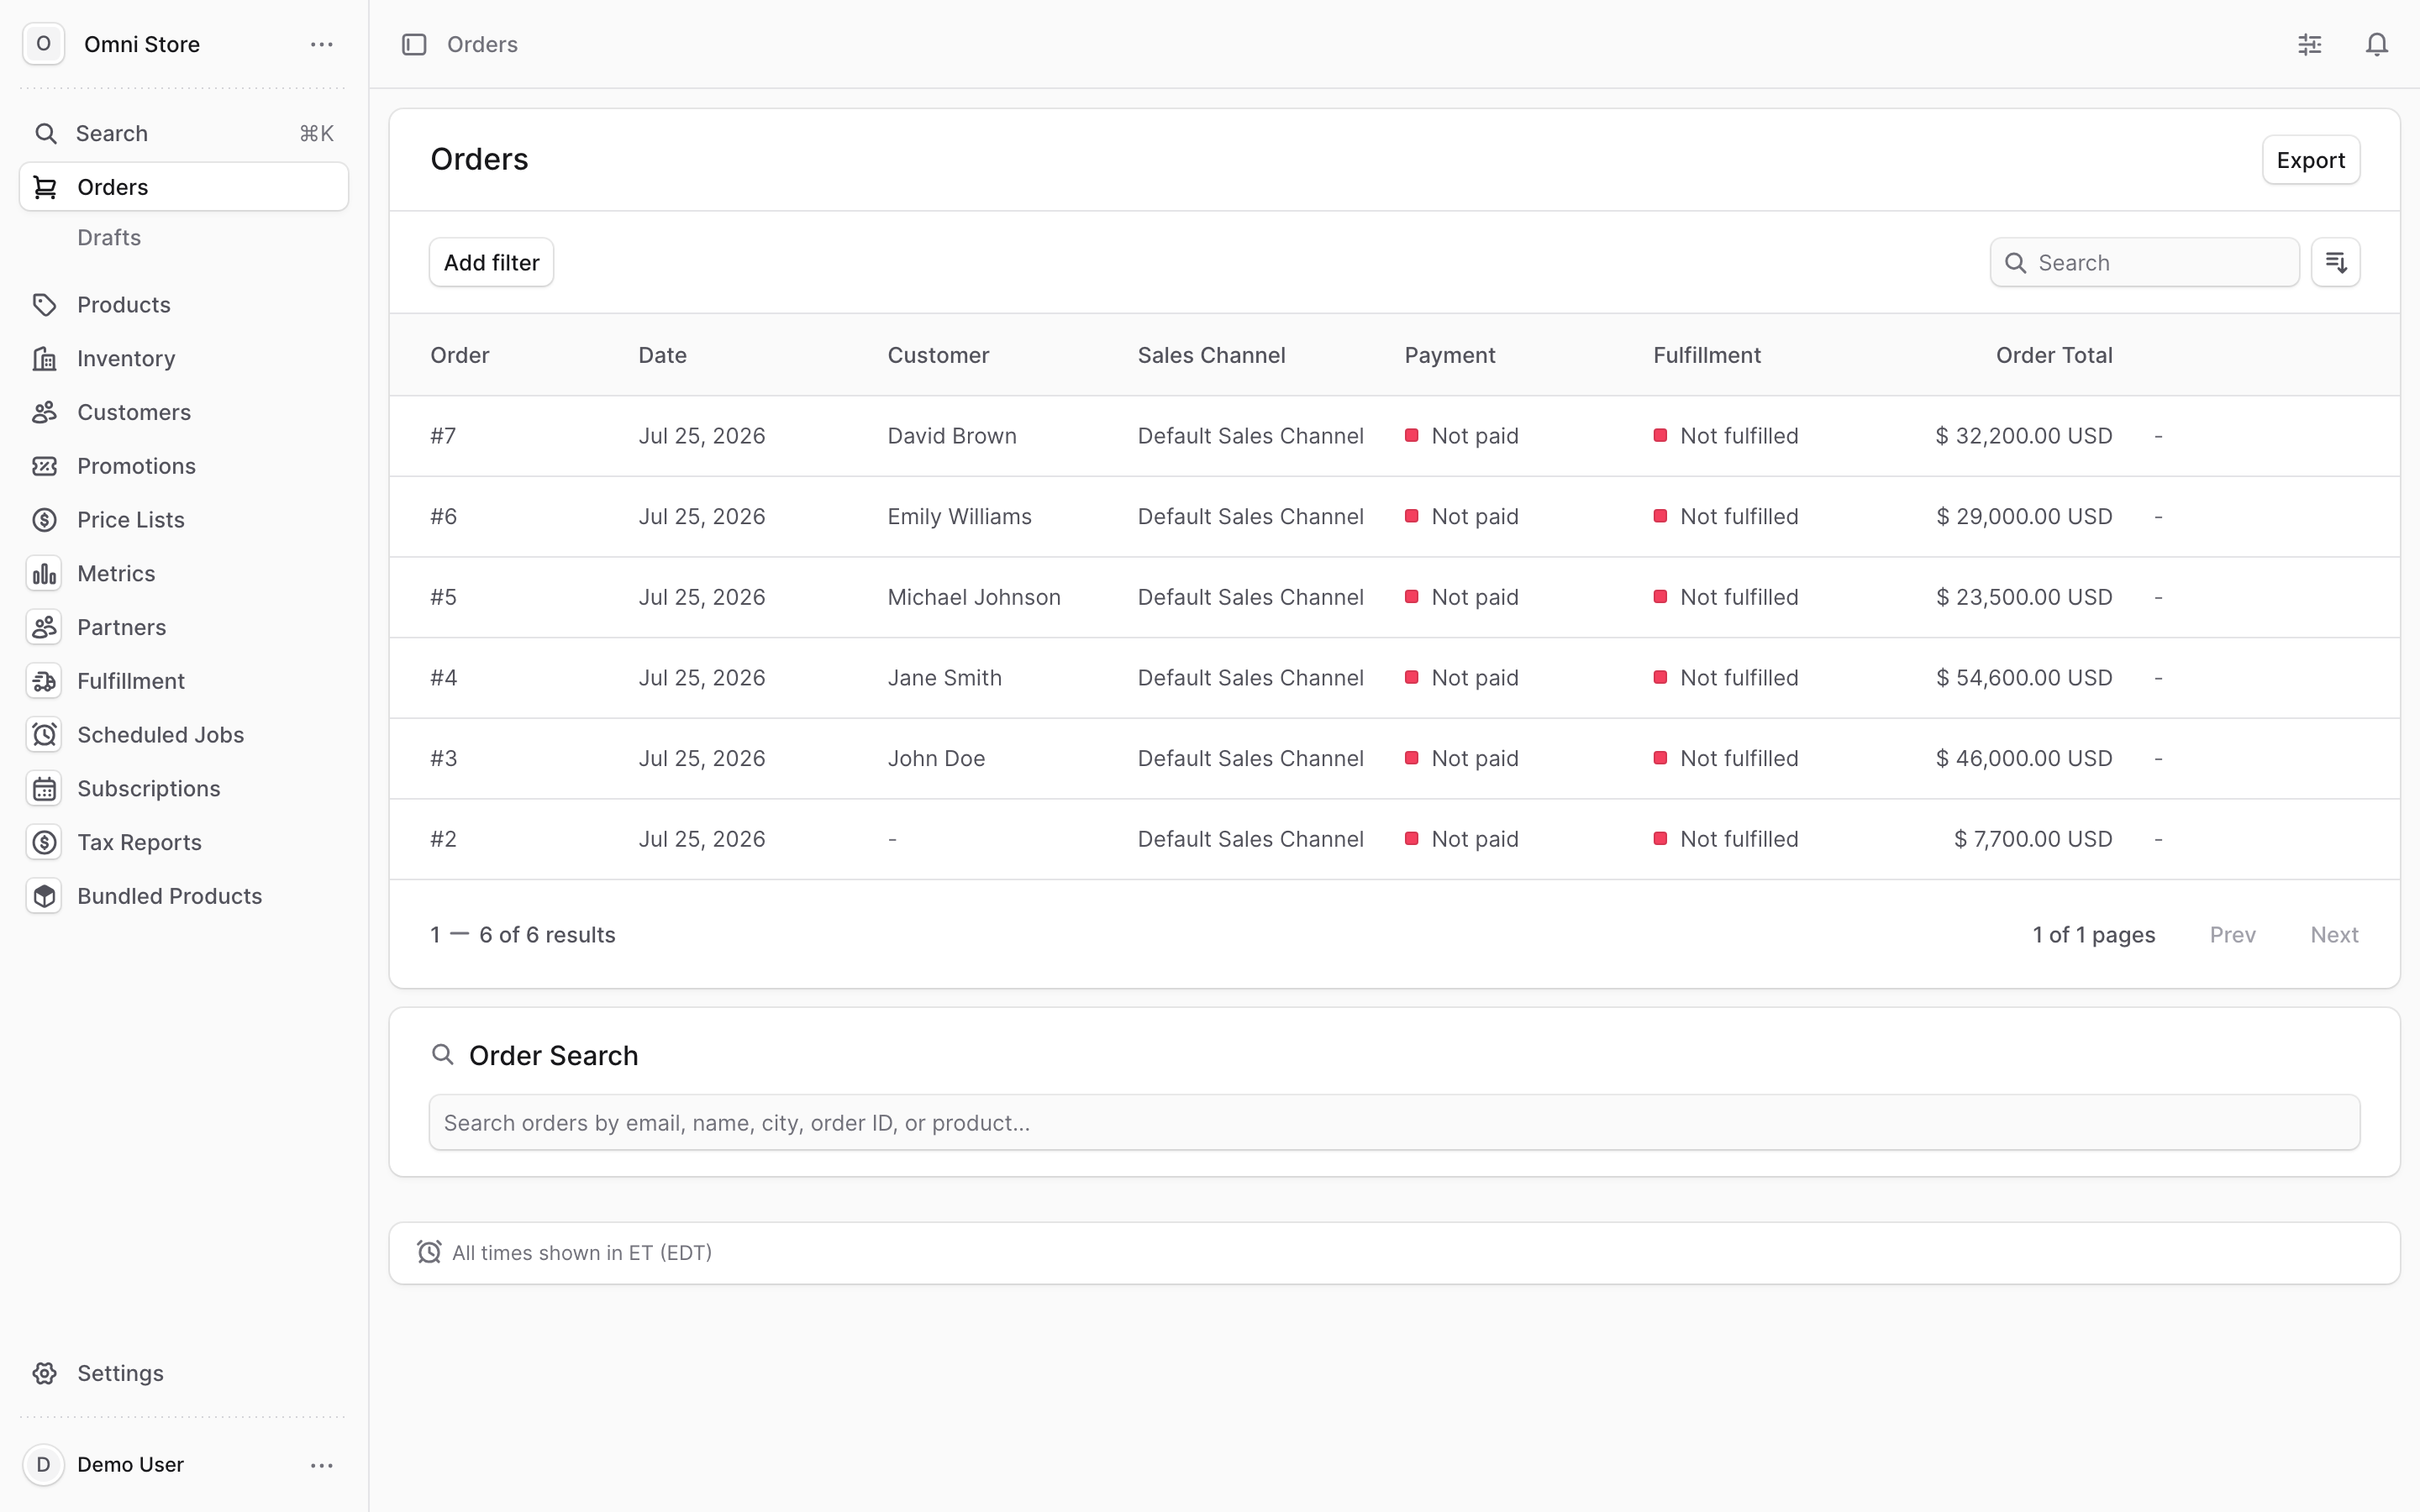
To find a specific order, use the search box at the top to search by:
- Customer email address
- Customer name
- City in the shipping address
- Order ID (#7, #1234, etc.)
- Product name or SKU
You can also click Add filter to narrow the list by additional criteria like date range, payment status, or sales channel.
2. Reading the order detail page#
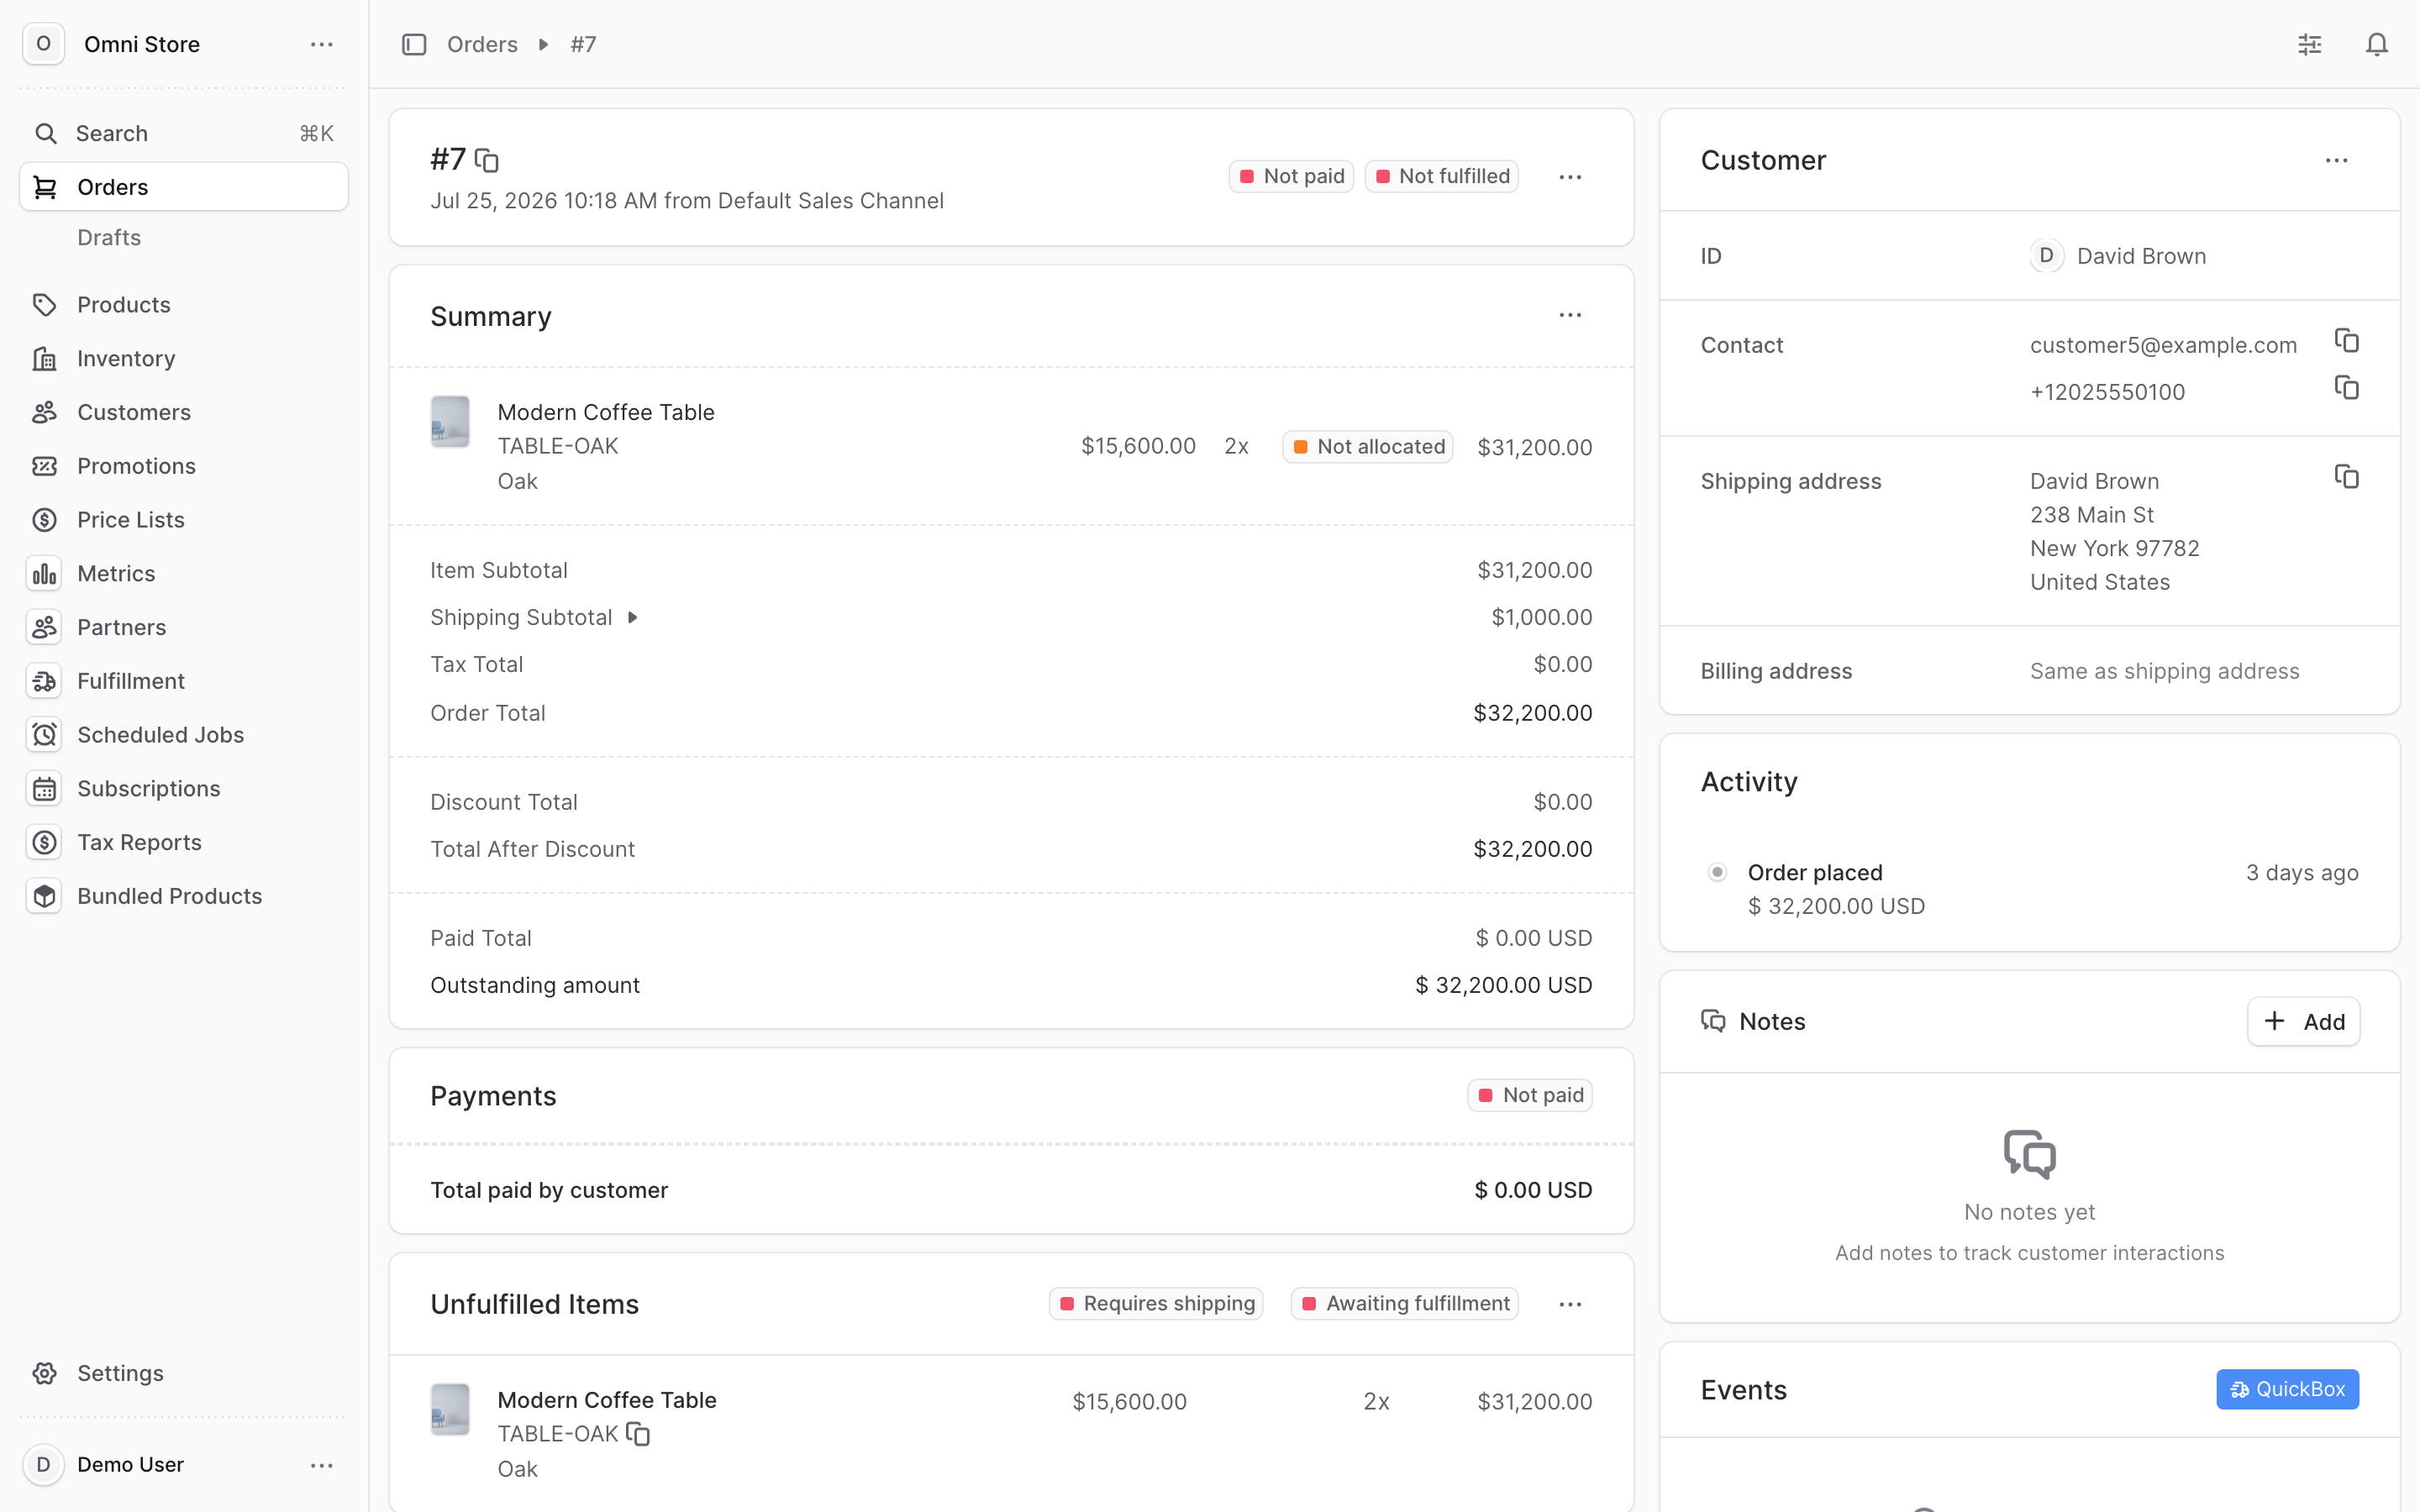
Click any order row to open its detail page. The order number and date appear at the top, along with the sales channel and two status badges (Payment and Fulfillment). A "..." menu in the top right gives you order actions.
The detail page is organized into panels:
Summary
Shows the line items in the order, with quantity and price for each. Below that, you'll see:
- Item subtotal — sum of all item prices
- Shipping — the shipping cost
- Tax — sales tax collected
- Order Total — the full amount the customer should pay
- Discount — any discounts or coupons applied
- Paid Total — how much has actually been paid
- Outstanding Amount — what's still unpaid (if any)
Payments
A record of every payment transaction against the order. Displays the payment method, amount, and date. If a payment failed or was refunded, you'll see that here.
Unfulfilled Items
Shows which line items haven't shipped yet. This tells you at a glance what's still awaiting fulfillment from the warehouse.
Customer
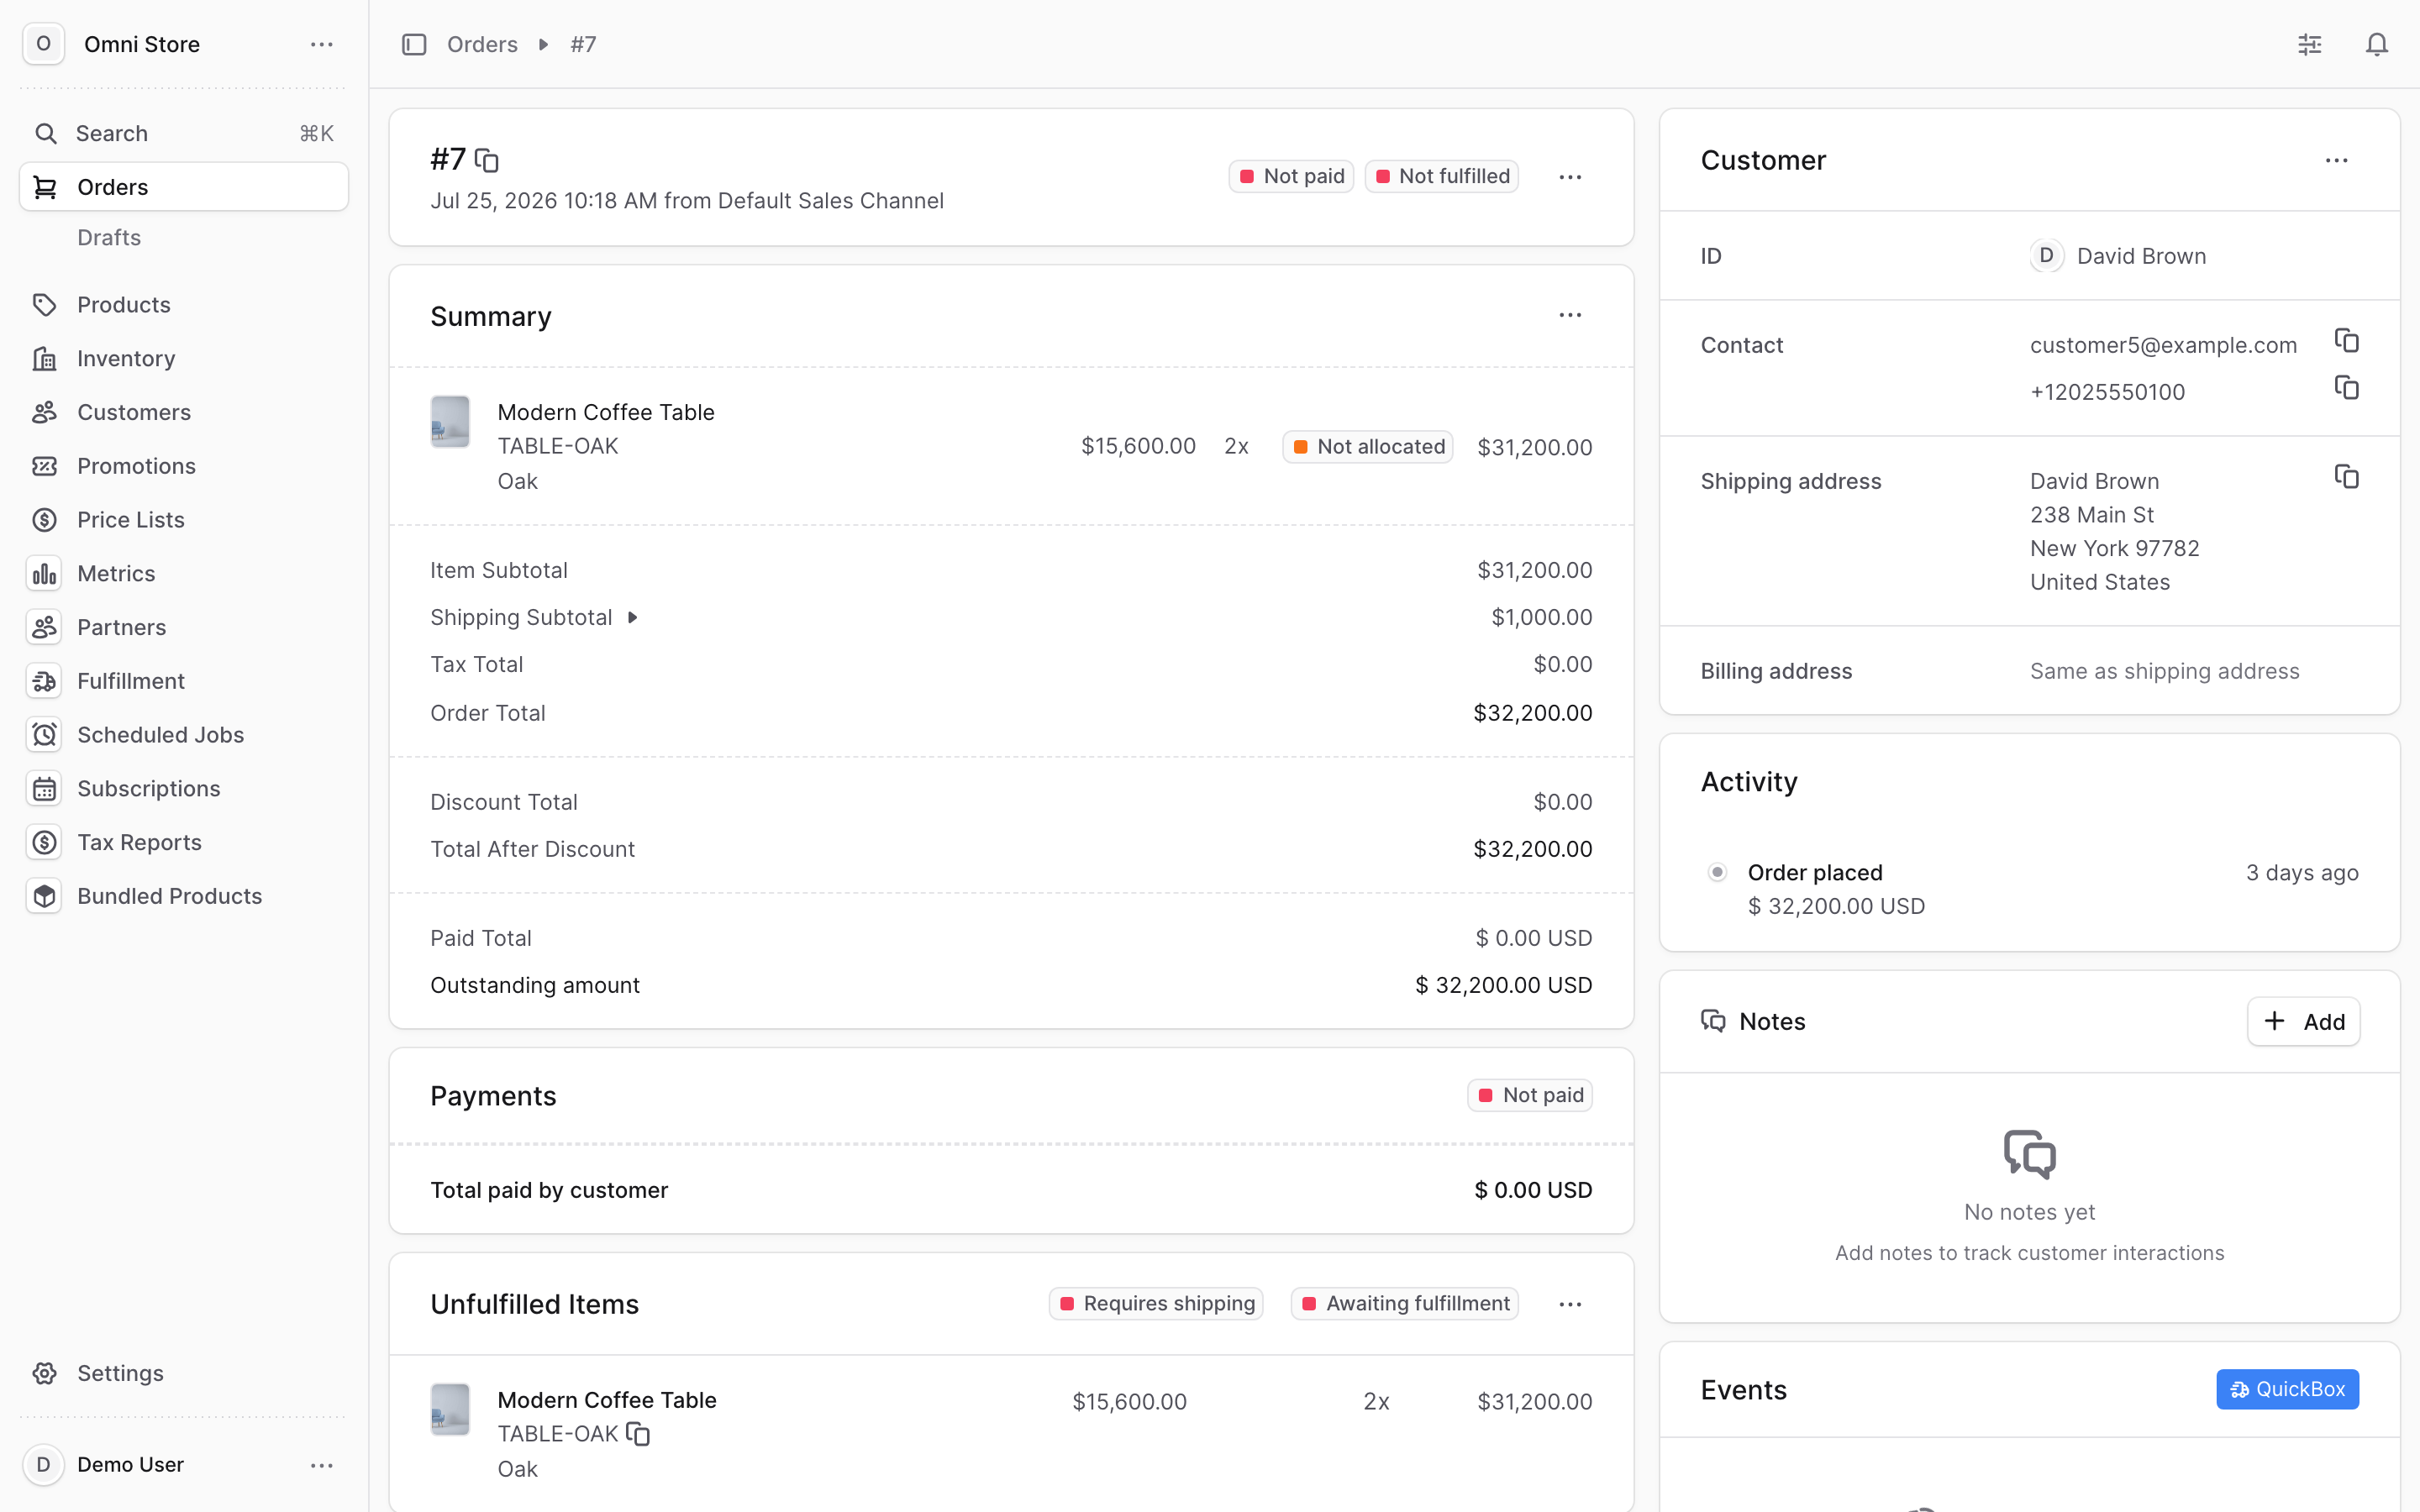
The customer's ID, email address, phone number, and both their shipping and billing addresses. This is where you'll verify delivery details or reach out if needed.
Activity
A timeline of everything that's happened to this order — when it was placed, when payment was received, when it was fulfilled, and any other system events. Hover over or click an event to see details.
Notes
A place to add or view internal notes. These are private to your team and not sent to the customer. Use this to record reasons for holds, special instructions, or investigation notes.
Events
A log of system events (webhooks, integrations, syncs). Usually for troubleshooting only.
Order Actions
Buttons to perform actions on the order, such as mark as fulfilled, refund, or hold.
3. Understanding order status#
Every order has two independent status badges at the top:
Payment
- Not paid — the order has not been paid in full yet
- Paid — payment has been received in full
Check the Payments panel to see the transaction details.
Fulfillment
- Not fulfilled — items in the order have not shipped yet
- Fulfilled — all items in the order have shipped
Items can also show Not allocated if they haven't been reserved in inventory yet. A fulfilled order still shows "Not fulfilled" if it hasn't reached the warehouse. These two statuses move independently — an order can be paid but not yet shipped, or shipped but not yet paid (in rare cases).
4. Adding an internal note#
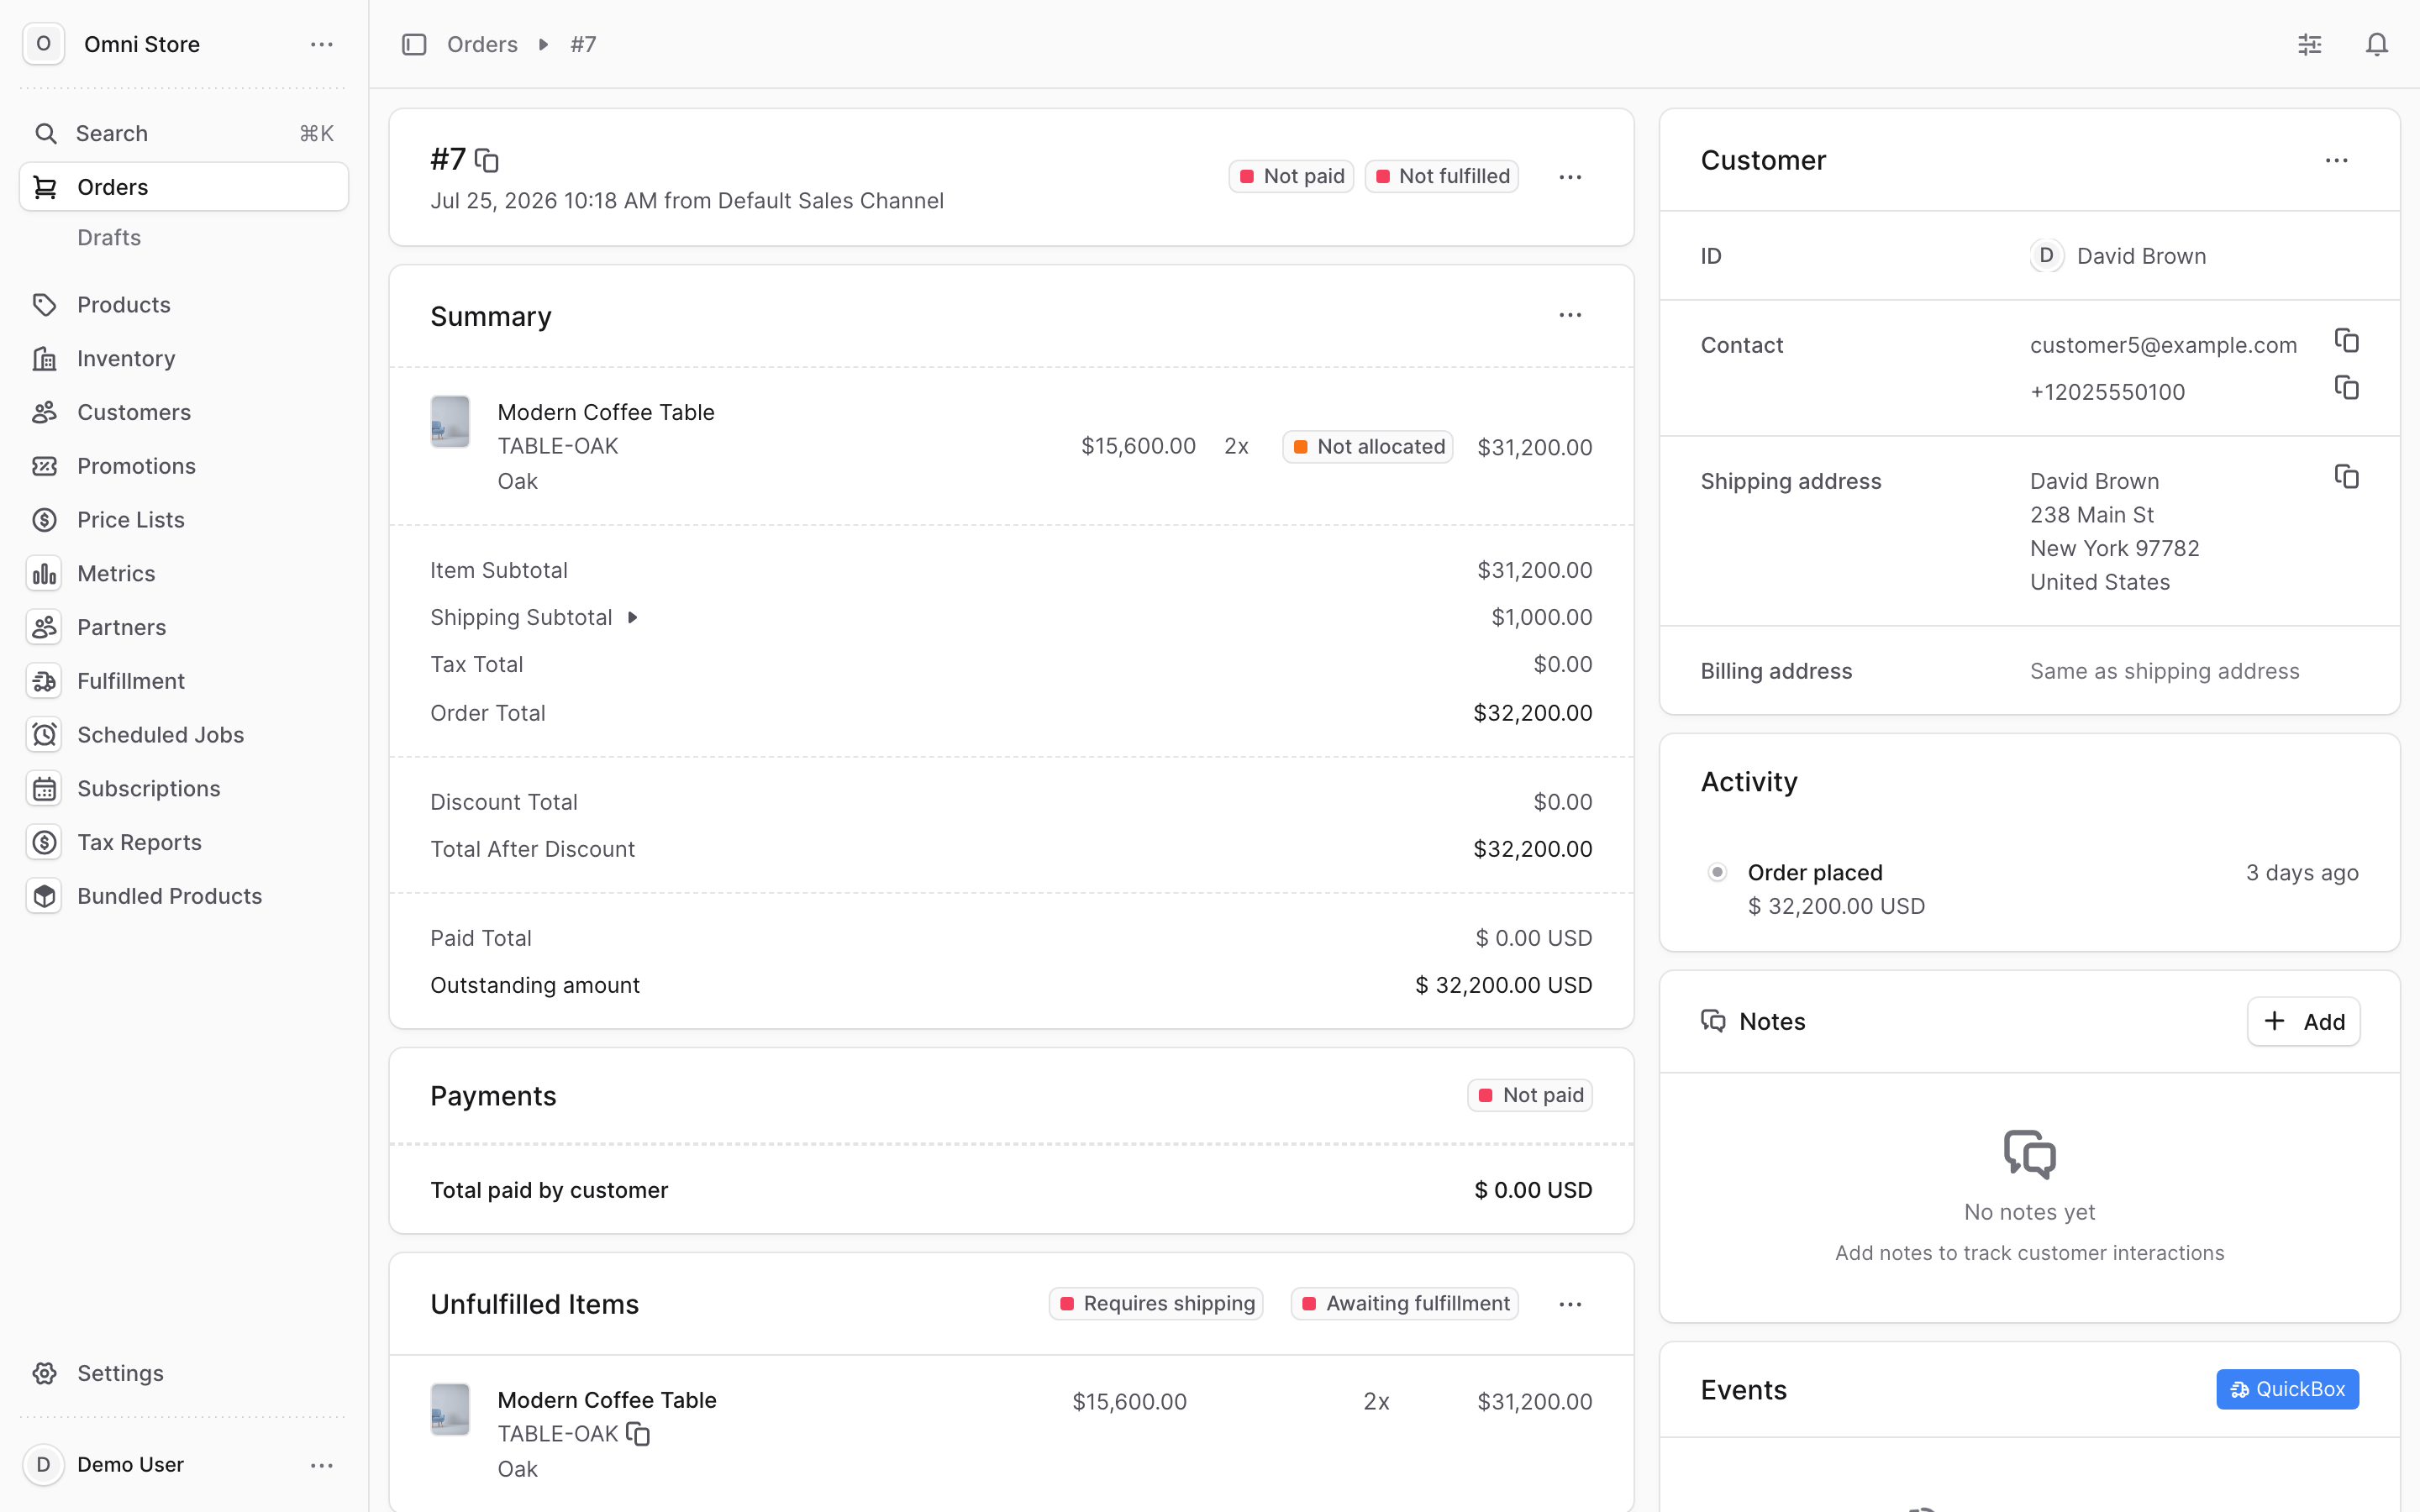
Click the Notes panel. You'll see any existing notes and an Add button. Click it, type your note, and save. Internal notes are visible only to your team — they never reach the customer.
Use notes to:
- Record why an order is on hold
- Leave instructions for the warehouse or customer service
- Flag an order for follow-up
- Document an investigation
5. Reading the activity timeline#
Click the Activity panel to see a complete chronological record of order events. The timeline shows:
- When the order was placed
- Payment received (date and method)
- When fulfillment occurred
- Any holds, cancellations, or refunds
- Email notifications sent
Click any event to expand it and see more detail.
Quick reference#
- To find an order: search by email, name, city, order ID, or product name.
- To see what's unpaid: check the Summary panel's "Outstanding Amount" and the Payments panel for transaction history.
- To see what's not shipped yet: check the Unfulfilled Items panel.
- To contact the customer: grab email and phone from the Customer panel.
- To add a team note: open Notes, click Add, and save. Customers won't see it.
- Payment and Fulfillment badges move independently — an order can be paid but not shipped, or vice versa.